
First Time Using a European eSIM: My Purchase & Activation Experience
I just arrived in Madrid, Spain, and wanted to share my experience buying and using an eSIM in Europe.
Why choose an eSIM?
My upcoming trip spans several countries (current plan: Madrid → Porto, Portugal → France → Slovenia). I won’t be staying long in each place, and I might even hop back and forth between countries, so having a solution that works across multiple European countries is super important.
Back when I traveled in South America, I’d just buy a physical SIM card locally. But if you’re hopping across multiple countries in a short time, that traditional approach becomes a headache:
You have to find a local carrier.
Wait in line to register.
Sometimes even show your passport.
After some research, I found that eSIMs are perfect for this kind of travel: no swapping physical cards, easy activation, fully online. While they’re common in North America, eSIMs are still rare in places like South America or Australia—I was using one for the first time myself.
Step 1: Make sure your phone supports eSIM
Check in your settings:
Network & Internet → SIM cards & mobile networks → Download new SIM card
I’m using a Motorola Moto G54, and it confirmed support.
If you see the option, your phone supports eSIM. You can also check online (for example, esim.sm) for your phone model.
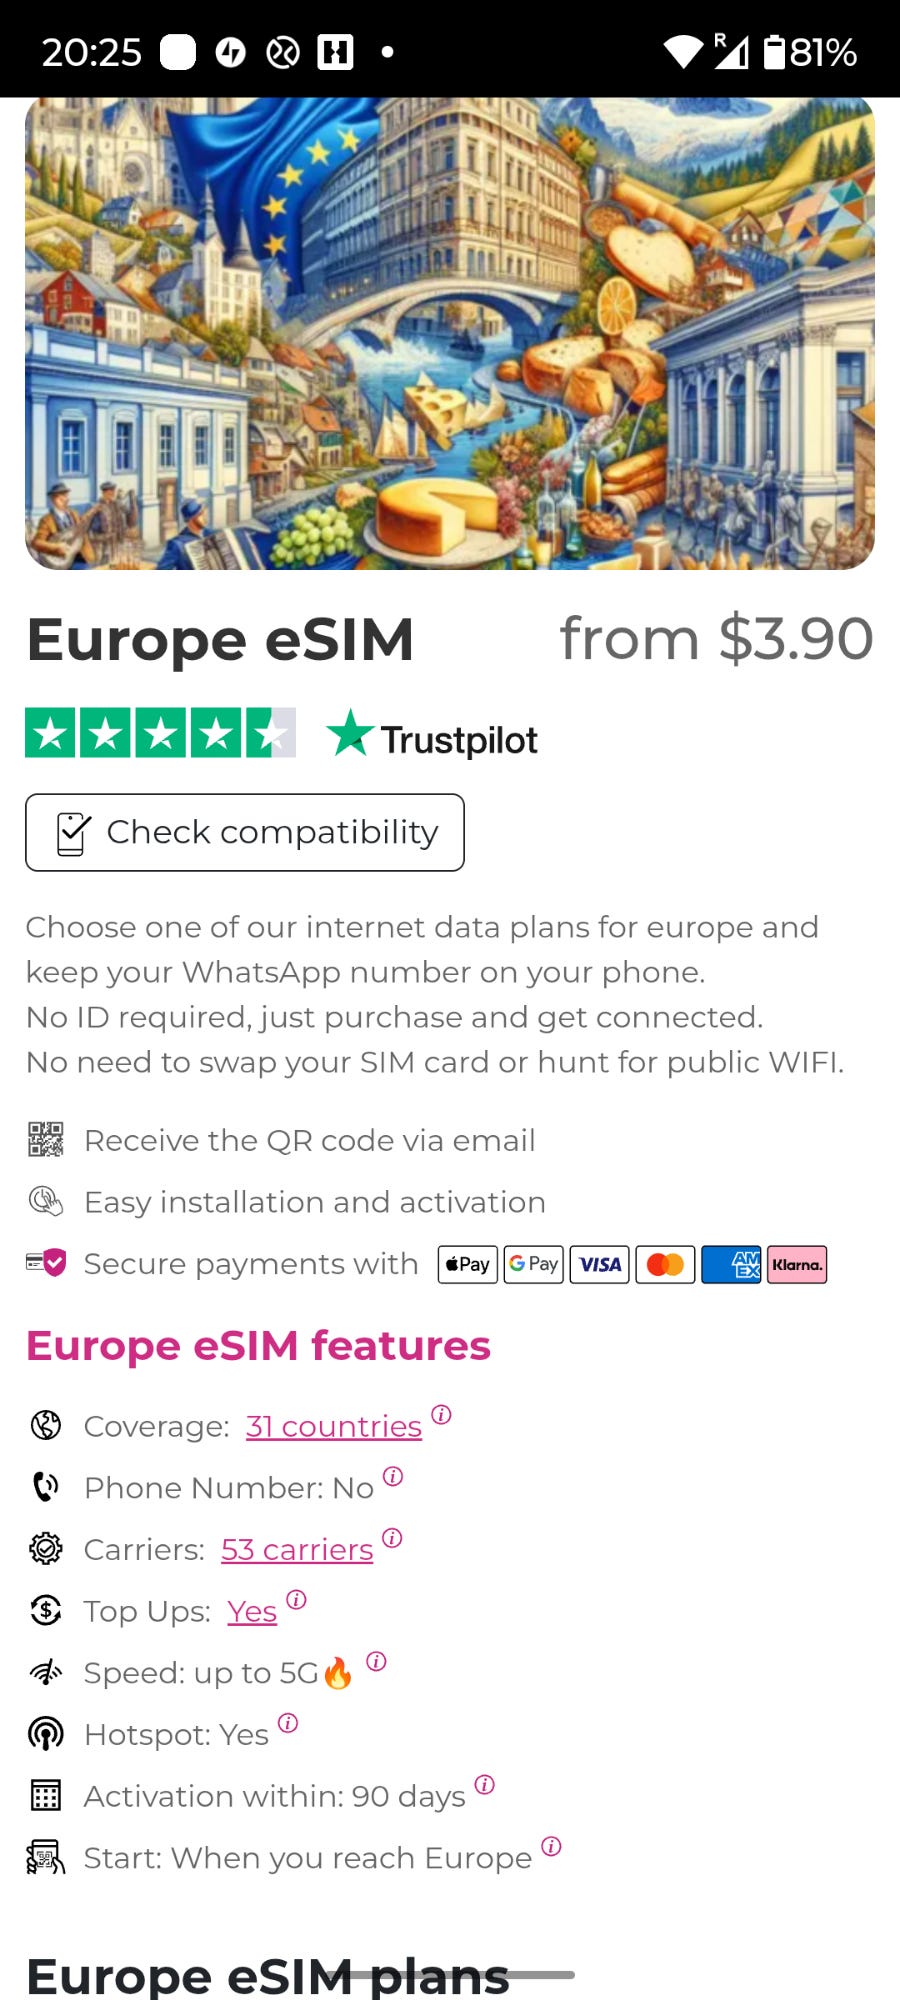
Step 2: Buy an eSIM & plan
I picked a plan on esim.sm:
Type: Data-only plan
Validity: 15 days
Coverage: Multiple European countries
Price: $6.30
Once activated, it works in other covered countries, like Spain, France, etc.
If you’re staying in just one country, you can choose that country’s plan—it’ll be cheaper.
Even within the EU/Schengen, prices vary by country. For example, Portugal’s plan is cheaper than Spain’s.
After paying online with a credit card, you’ll immediately (or within a few minutes) get an email containing a QR code and an activation code—these are your key credentials for activating the data.
Step 3: Activate your eSIM (super easy)
You can do this from home—no passport, no carrier visit, no language worries:
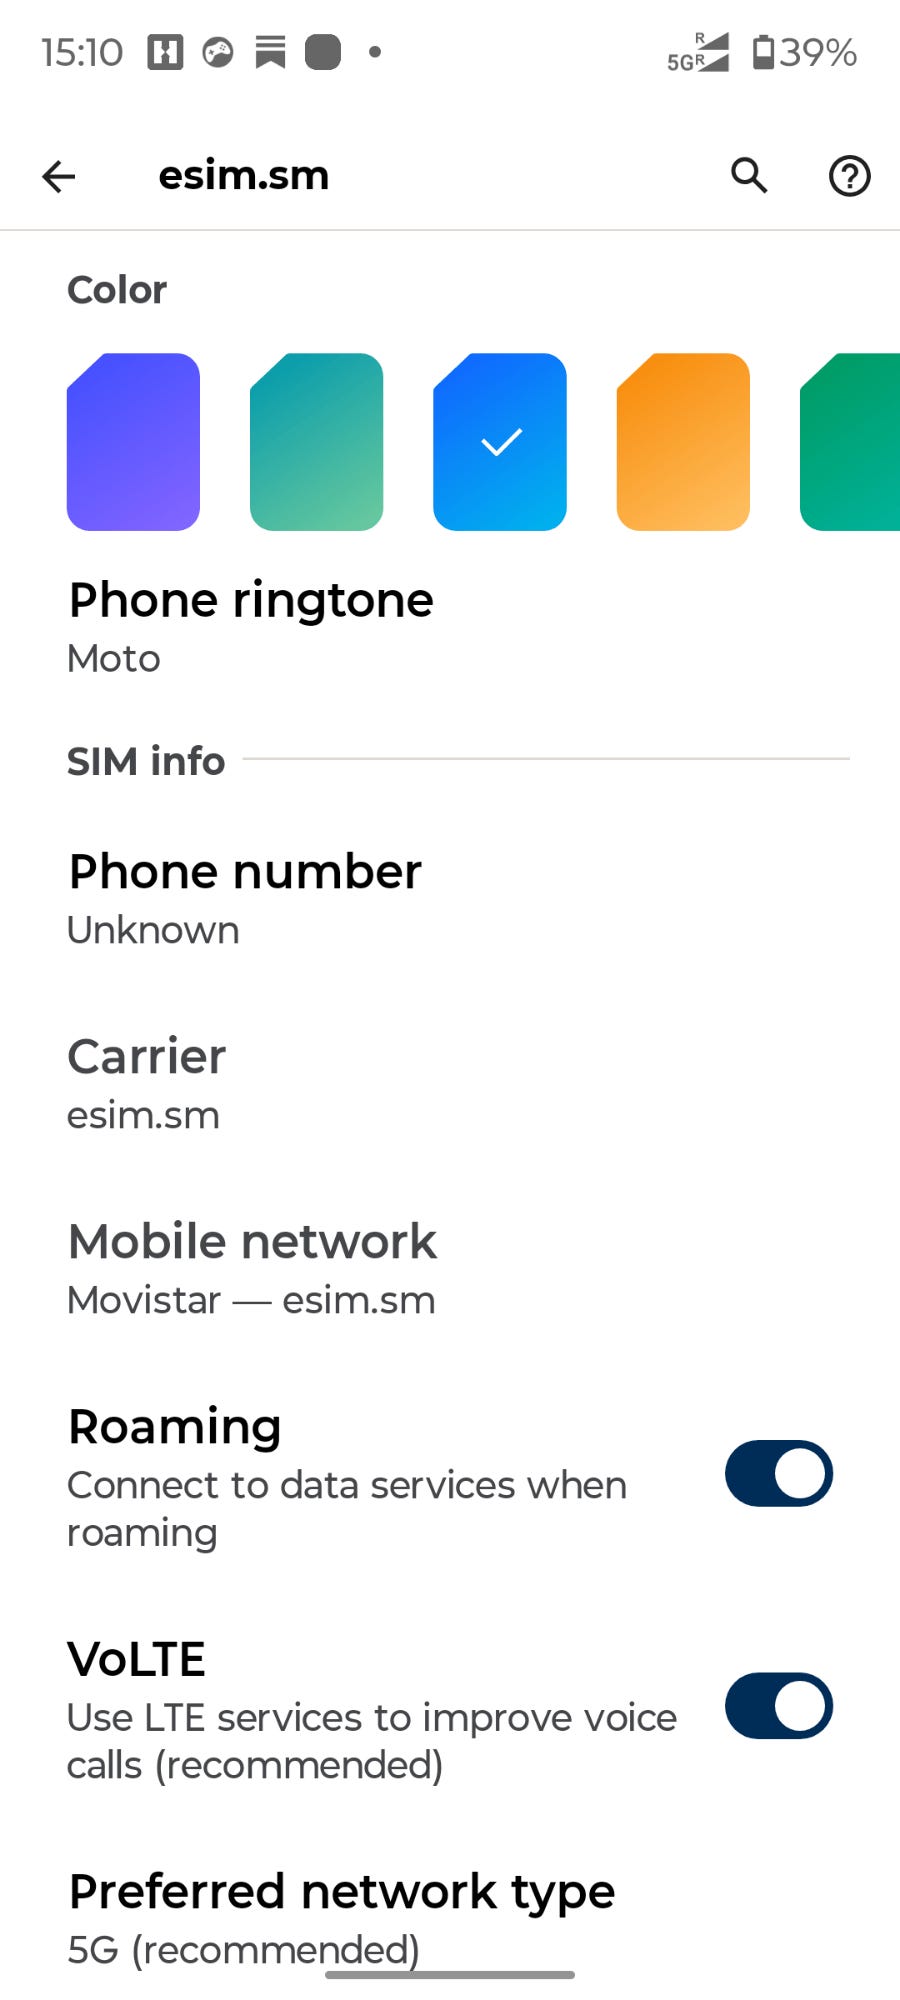
Go to Settings → Network & Internet
Find SIM card settings → SIM cards & mobile networks
Add eSIM → tap Download new SIM card (or similar)
Enter info → scan the QR code or manually input the activation code
Success → for a single-country plan, you can usually go online immediately
For multi-country European roaming plans (like mine), you must turn on “Data Roaming”! Otherwise, even if activated, you might not be able to connect.
How to turn it on: in SIM cards & mobile networks, find your eSIM plan and switch on Data Roaming. The network should work instantly
.
My experience
Convenient: Entirely online, no need to visit a store, no language barrier
Essential: Traveling in Europe means checking trains, buses, maps, and contacts requires the internet. Before, I had to rely on hostel WiFi for the first two days—so inconvenient. Once the eSIM was active, everything became smooth.
Cost-effective: $6+ for 15 days is a steal for light usage (info lookup, messaging).
Summary & Advice
If you’re like me—frequent, short-term, multi-country travel in Europe—an eSIM is definitely worth considering:
No hassle of swapping physical SIM cards
Easy activation
Transparent pricing
Extra tips for Chinese Mobile users:
I’ve heard many phones bought in China don’t support foreign eSIMs well. My suggestions:
Buy a cheap second-hand eSIM-compatible phone abroad to act as a hotspot for your main phone.
Or prepare a backup eSIM-capable phone before leaving.
This way, you solve your internet issue and have a backup phone in case of theft—a two-in-one solution.
Primer uso de un eSIM en Europa: mi experiencia comprando y activando
Keep reading with a 7-day free trial
Subscribe to Lowprofile Freedom’s Substack to keep reading this post and get 7 days of free access to the full post archives.